Windows ME/XP/2003 have built in ZIP file support. It is therefore, very easy to make and extract ZIP files using these operating systems.
To create a ZIP file:
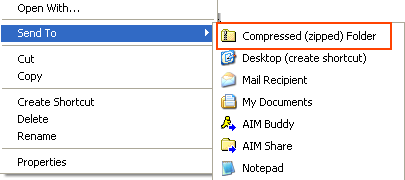
Right click on a file, folder, or selection of files and click on the Send To menu option and then choose Compressed (zipped) Folder. The image below shows the location of these menu items:

After selecting the Compressed (zipped) Folder menu option, the files will be zipped and you should now see a file that ends with .ZIP. The files name will be the name of the folder or file you compressed. If you compressed a selection of files, it will be the name of the first file in that selection.

After selecting the Compressed (zipped) Folder menu option, the files will be zipped and you should now see a file that ends with .ZIP. The files name will be the name of the folder or file you compressed. If you compressed a selection of files, it will be the name of the first file in that selection.
To extract a ZIP file:
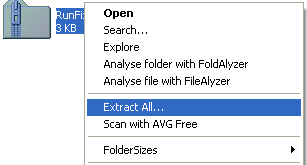
1. Right-click on a ZIP file and select the Extract All... menu option as shown in the image below:
2. You will now be presented with a screen similar to the one below.
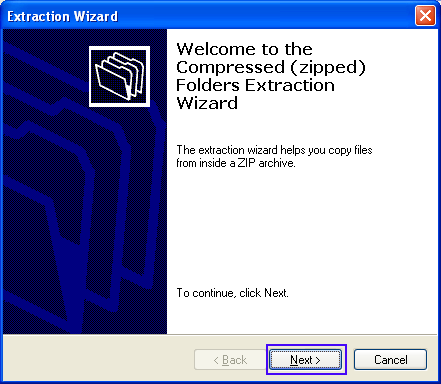
Press the Next button.
3. At this next screen, as shown in the figure below, enter the path where you would like the files to be extracted to. In the image below I am extracting the files in the ZIP archive to the directory d:\extracthere. If that directory does not exist, it will be created.
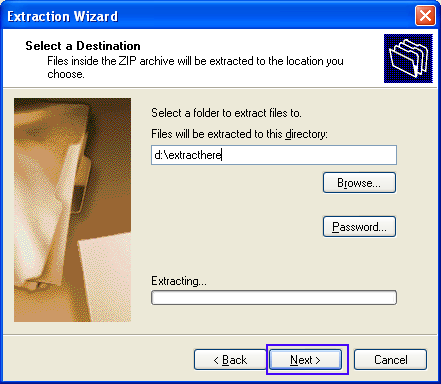
After you type in the location where you wish the files to be extracted to, press the Next button.
4. The files have now been extracted and you are presented with a screen similar to the one below asking if you would like to open the folder you extracted the files to.
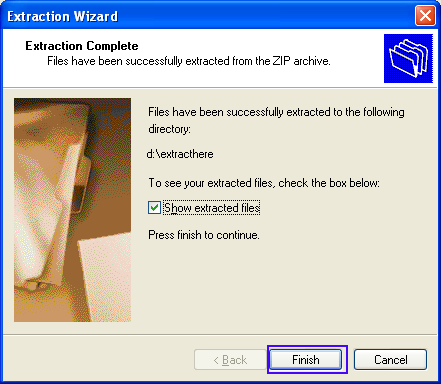
If you want to see the extracted files, leave the checkmark in place, otherwise uncheck the box labeled Show extracted files. Then press the finish button.
Now your files are extracted into the directory you have specified and you can begin to use them.
EmoticonEmoticon